Introduction to Procreate
By Román García Mora , Illustrator and 3D Modeler
Take your illustration studio with you wherever you go with the leading drawing app for iPad
Take your illustration studio with you wherever you go with the leading drawing app for iPad
Domestika Basics · 7 courses included
-
Course 1 – Laying the Groundwork
By Román García Mora
Explore Procreate and the equipment you need get the most out of the program
-
Course 2 – First Lines
By Román García Mora
Discover Procreate's brushes and tools and let your instinct take over
-
Course 3 – Actions Menu
By Román García Mora
Harness everything Procreate has to offer and take your drawings to the next level
-
Course 4 – Adjustments Menu
By Román García Mora
Learn how to apply filters and effects and edit your illustrations
-
Course 5 – Layers
By Román García Mora
Discover the importance of layers in the digital illustration workflow
-
Course 6 – Selection and Transform Tools
By Román García Mora
Learn to edit your illustrations using these two powerful tools
Throughout the history of digital illustration there have been a succession of leading programs, from FreeHand to Adobe Illustrator, through CorelDRAW and many more. Today, Procreate has taken their place as the top illustration app for iPad. In this seven-course Domestika Basics, master Procreate from scratch with Román García, illustrator and biologist who has collaborated with renowned magazines such as National Geographic and the Real Jardín Botánico of Madrid.
The first course is all about laying the groundwork, analyzing the synergy between Procreate, the iPad Pro, and the Apple Pencil, and why this is the perfect combination for tackling illustration projects. Start by installing the application and beginning to explore its interface.
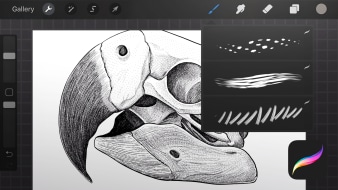
In the second course, draw your first lines in Procreate before taking a tour of the program's different brushes and basic drawing tools for creating your own digital sketches.
In the third course, get familiar with the Actions menu, which allows you to add images and text, edit the canvas, share images, record your drawing process, and much more.
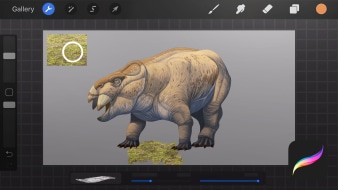
Focus on the Adjustments menu in the fourth course and explore filters and features such as Blur, Noise, Liquify, Recolor, as well as basic image editing functions.
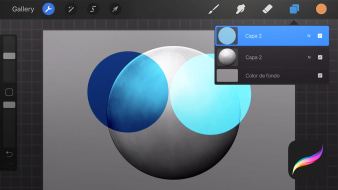
In the fifth course, discover the importance of layers in the Procreate workflow. See how they are organized, how to create new layers and merge them, and how to organize them into groups. Then, learn about blending modes, masks, and reference layers.
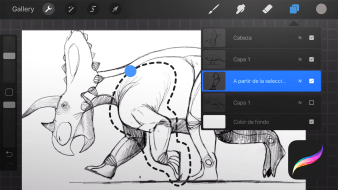
Next, delve into the selection and transformation options and explore how to transform, deform, and select parts of your illustrations.
The seventh and final course of this Procreate Basics is dedicated exclusively to Brushes. Learn how to work with each type and adjust their settings to create different kinds as well as organize them into groups depending on their style.
Technical requirements
- ⦁ An iPad that’s compatible with the Apple Pencil. For more information on compatible models follow this link.
⦁ An Apple Pencil is recommended in order to get the most out of Procreate.
- 98% positive reviews (1.5K)
- 68,795 students
- 55 lessons (6h 0m)
- 7 courses
- 36 downloads (27 files)
- Online and at your own pace
- Available on the app
- Audio: Spanish, English, Turkish
- Spanish · English · Portuguese · German · French · Italian · Polish · Dutch
- Level: Beginner
- Unlimited access forever
- Updated on 06/12/2020
Reviews

Román García is not only an illustrator but also a biologist. Since 2008, he has been dedicating himself mainly to scientific and informative illustration projects and his drawings have been published in prestigious publications such as National Geographic Magazine and Quo Magazine. He also collaborates with the Real Jardín Botánico of Madrid producing illustrations for the CSIC's Flora Iberica project.
His work consists of creating images of things that we cannot see because they belong to the past, the world of imagination, or simply because they are not perceptible to the human eye. To achieve this, he uses digital illustration as the foundation for his work and combines it with traditional techniques, 3D modeling, and illustrative retouching.
Content
Course 1 – Laying the Groundwork
-
U1
Introduction
-
Introduction
-
-
U2
Team
-
Team
-
-
U3
Procreate and Apple pencil installation
-
Procreate and Apple pencil installation
-
-
U4
Presentation of the Procreate work environment
-
Presentation of the Procreate work environment
-
-
U5
Creating documents
-
Creating documents
-
-
U6
Actions and organization of documents
-
Actions and organization of documents
-
-
U7
Preparation of a digital sketchbook
-
Preparation of a digital sketchbook
-
Course 2 – First Lines
-
U1
Introduction to drawing tools in Procreate
-
Introduction to drawing tools in Procreate
-
-
U2
Brush Library
-
Brush Library
-
-
U3
Quick Shape tool
-
Quick Shape tool
-
-
U4
Color drop
-
Color drop
-
-
U5
Colour selection
-
Colour selection
-
-
U6
Color Palette Creation
-
Color Palette Creation
-
-
U7
Creation of digital sketches
-
Creation of digital sketches
-
Course 3 – Actions Menu
-
U1
Introduction
-
Introduction
-
-
U2
Add tab: Images and text
-
Add tab: Images and text
-
-
U3
Canvas Tab: Basic Options
-
Canvas Tab: Basic Options
-
-
U4
Canvas Tab: Drawing Guides
-
Canvas Tab: Drawing Guides
-
-
U5
Share tab: image and layers
-
Share tab: image and layers
-
-
U6
Video tab: Accelerated time recording
-
Video tab: Accelerated time recording
-
-
U7
Options and Help tab
-
Options and Help tab
-
-
U8
Access to brushes with the Quick Menu
-
Access to brushes with the Quick Menu
-
-
U9
Create a character using the Symmetry drawing guide
-
Create a character using the Symmetry drawing guide
-
-
U10
Animation help
-
Animation help
-
-
U11
Reference Viewer
-
Reference viewer
-
Course 4 – Adjustments Menu
-
U1
Introduction
-
Introduction
-
-
U2
Blur, Focus and Noise.
-
Blur, Focus and Noise.
-
-
U3
Liquefy
-
Liquefy
-
-
U4
Image editing
-
Image editing
-
-
U5
Modifying a sketch with the Liquify tool
-
Modifying a sketch with the Liquify tool
-
-
U6
Clone fit
-
Clone fit
-
-
U7
Gradient map
-
Gradient map
-
-
U8
New filters
-
New filters
-
Course 5 – Layers
-
U1
Introduction
-
Introduction
-
-
U2
Actions
-
Actions
-
-
U3
Introduction to Opacity and Layer Fusion Modes
-
Introduction to Opacity and Layer Fusion Modes
-
-
U4
Application of layer fusion modes
-
Application of layer fusion modes
-
-
U5
The masks
-
The masks
-
-
U6
Reference layers
-
Reference layers
-
-
U7
Development and finishing from a sketch
-
Development and finishing from a sketch 1
-
Development and finishing from a sketch 2
-
-
U8
Private layer
-
Private layer
-
Course 6 – Selection and Transform Tools
-
U1
Introduction
-
Introduction
-
-
U2
Transform tool
-
Transform tool
-
-
U3
Warp tool
-
Warp tool
-
-
U4
Selection Modes
-
Selection Modes
-
-
U5
Transformation of a sketch
-
Transformation of a sketch
-
Course 7 – Brushes
-
U1
Introduction
-
Introduction
-
-
U2
The parameters of the Brushes
-
The parameters of the brushes 1
-
The parameters of the Brushes 2
-
-
U3
Creation of a SUV Brush
-
Creation of a SUV Brush
-
-
U4
Creating a brush with shapes
-
Creating a brush with shapes
-
-
U5
Creating a textured brush
-
Creating a textured brush
-
-
U6
Basic actions with brushes
-
Basic actions with brushes
-
-
U7
Creating a collection of Dotting brushes
-
Creating a collection of Dotting brushes
-
See the content of the 7 courses
About Domestika Basics
Domestika Basics is a series of courses focused on teaching the most commonly used software by creative professionals worldwide.
The content has been meticulously curated and is intended for both students going into a new creative field and more experienced professionals who want to polish their skills.
Learn with the best Domestika teachers through practical lessons, tons of resources, and a progressive difficulty that'll allow you to see results from day one.
Domestika Basics will allow you to step up your professional game and be prepared to score better projects.
-
Without prior knowledge.
Domestika Basics gives you everything you need to get started in a new creative field and become an expert in it.
-
Focused on the tool.
Discover its main components, techniques, and the tried-and-true methods you need to master it.
-
Learn fast
With a straightforward, step-by-step approach, our outstanding professionals will teach you how to get the most out of the program.
-
Certificates Plus
If you're a Plus member, get a custom certificate signed by your teacher for every course. Share it on your portfolio, social media, or wherever you like.



eceje
Es muy claro explicando, muy buen curso para iniciarse en procreate, lo recomiendo.
View translation
Hide translation
teodoro_rodrigo01
Dos cursos basics de procreate achei esse o mais rico e com maior aproveitamento de conteúdo.
View translation
Hide translation
elninodevelcro
Es una muy buena manera de entrar en el mundo digital. El software es potente, el profe, muy bueno, y el curso perfecto para hacerte con la herramienta perfecta.
View translation
Hide translation
octalopestd
Excelente curso para aprender procreate. Bem didatico e minuncioso
View translation
Hide translation
marika_na
Assolutamente spettacolare nelle spiegazioni passo passo.
Lo consiglio per chi non ha mai usato procreate, si inizia da zero con tanti preziosi consigli.
View translation
Hide translation